building instructions
before i begin to describe how to build one of those wonderful little matchbox pinhole cameras i would like to credit the person, who has some kind of invented this type of camera: alspix - thanks a lot for this wonderful idea! in case something is not really clear among the following instructions it might also be worth to have a look at his original instructions.
something else worth noting is that despite the fact, that this camera looks very simple, it takes quite some time to build one. one should assess at least a few hours for this task - also it sometimes takes a few generations of cameras until everything works nearly perfect, but in exchange this camera can be used for many films if handled carefully. also it is recommended to read these instructions once completely before starting to build the camera. and as a last note: if you want to print these instructions it might be a good idea to use this more printer friendly version.
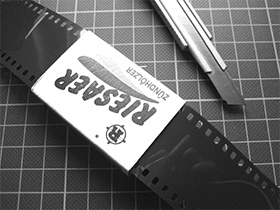
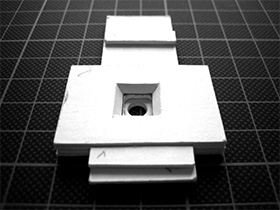
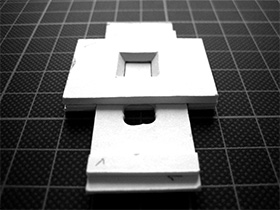
ok, lets start building the camera. the first step is to find a properly sized matchbox - one needs one which is 35mm wide, so that a 35mm film fits exactly through it. next one has to cut out the film window from the base of the drawer. it should be 36mm x 24mm for the standard 35mm picture size. as can be seen from the pictures i initially used a smaller and square size, but i change it to the standard film size later, because this way the negatives can be handled normaly (making prints from them in the lab, scanning them etc.) and the larger images give some more reserve for later cropping. this might ne necessary, because of the nonexistent viewfinder it is not possible to compose very exact with this camera.
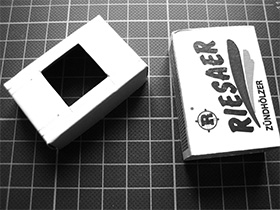
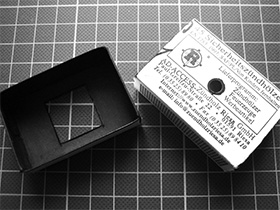
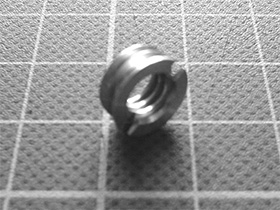
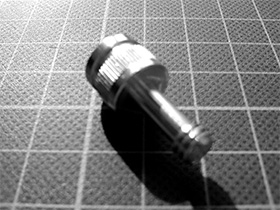
now the inside of the drawer and of the matchbox itself can be painted using a black marker to avoid reflections inside of the camera and a small hole (around 5mm) has to be put into the front of the matchbox onto which the metal foil containing the pinhole will be glued. for making the pinhole it is recommended to cut the smallest sewing needle available and put it into the eraser end of a pencil. the aluminium or brass foil used for the pinhole should be as thin as possible but still stable - i used 0.07mm aluminium foil from an art and crafts supply shop. now one can try to carefully make the hole using the needle or first dent the foil, grind the dented part with extremely fine sandpaper (i used sandpaper of the category 1000) and make the hole in the grinded part. this is supposed to give rounder holes. the goal is to create a hole of about 0.15mm which is as round as possible.
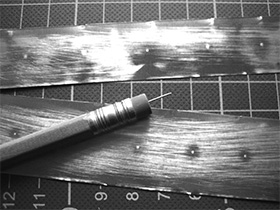
one should make about a dozen holes and choose the best one of them accoring to the criteria mentioned above. if available it is a good idea to use a transparency scanner to inspect the hole - otherwise it can be done using a 8x or 10x magnifying glass. below is an example of a quite good hole created with the needle methode described above. alternatively to making the pinhole yourself as described it is also possible to buy pecision made pinholes on the net (for instance the 0.15mm version here).

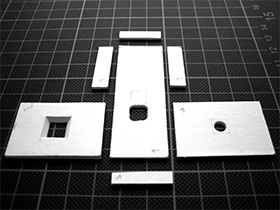
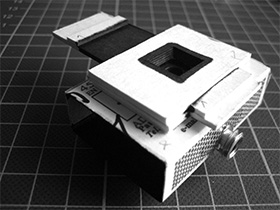
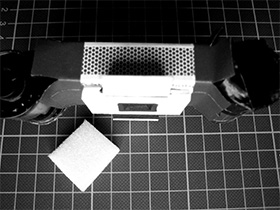
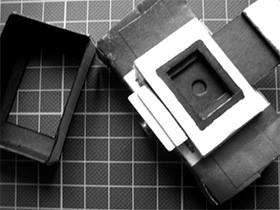
the next part of the camera to be built is the shutter. for this some 1.5mm ... 2mm sturdy cardboard is required. the parts have to be cut and assembled as outlined in the pictures. please keep in mind that the shutter shown in the images was made for my earlier camera utilizing a smaller squared picture size. for the normal 35mm picture size of 36mm x 24mm the windows of the shutter have to be larger and wider. please have a look at the pictures at the end of these instructions to get an idea of the size required for that larger film size. it is a good idea to glue a piece of normal paper on top of the small side pieces of the shutter in order to make the inner part slide a bit easier between the lower and the upper part. all the cutting and assembly should be done very careful, so that the resulting shutter will run precise: not stiff and not tipsy. while and after assembling the shutter it is a good idea to paint all parts along the path of light into the camera again using a black marker to avoid reflections.
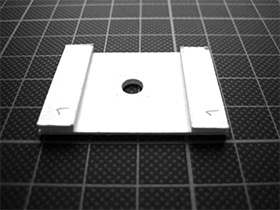
after the glue has dried (i used "uhu extra" glue which worked very well, it dried quickly and and glued strong) it should be aligned exactly with the hole on top of the matchbox and its position (the most intuitive way to operate the shutter most properly is to open it upwards) should be marked with a pencil on the matchbox. now the foil with the pinhole can be glued on the back of the shutter, making sure that the pinhole is exactly in the center from the front. the next step is to glue the shutter including the pinhole foil onto the matchbox following the pencil marks from the last step.
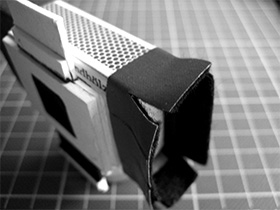
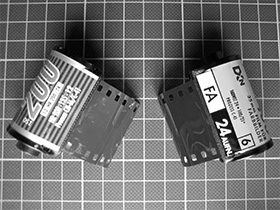
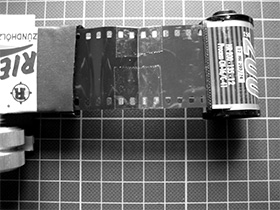
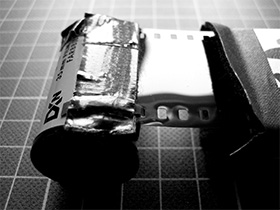
now it is a good idea put some overlapping duct tape on both ends of the matchbox and cover its inside with some black felt or something similiar. this should help the get the contact point of the matchbox and the film spools more light tight. this contact point is the most sesitive place for light possibly leaking into the camera. the next step is to take the film out of one film spool which has to be sacrificed and cut it straight at about 10cm before its end. another film spool (the actual film to be used) has to be cut straight as well, but at its begining. now the 10cm film of the sacrificed film spool has to be put from the right side (looking from the back of the matchbox - the sacrificed film spool on the right should be oriented that way, that its rotatable handle looks upward) through the matchbox (behind the drawer) and should be glued with the film from the other film spool (again looking from the back of the matchbox on the left side those rotatable handle should look downward) using clear scotch or tesa tape. as the second to last step before the final assembly of the camera now some little foam pieces should be put on the ends without the rotatable handle on both film spools to give the spool some tension. the foam can simply be fixed using some duct tape (see the last image of the next image section on top of the right film spool).
the last step before the final assembly of the camera is to create the so called "clicker", which is used to make sure that the film is transported the right amount ot the next picture. it is built from some kind of plastic spirals, which are used to bind documents in copy shops. carefully cut a part from such s spiral and make it small enough, so that it cleanly fits into the firm perforation. this clicker will now be fixed on the film spool with the whole film in it (on the left side from the back of the camera) using duct tape. the clicker should go about 2mm into the film perforation and that as close as possible to the film spool itself, to avoid it getting sqashed in when the film spool is being put close to the matchbox on final assembly. the function of the clicker should be tested now by pulling out some film from the spool.

now that the clicker is in place the camera can be assembled finally. first spool the film into the full spool - now both spools should be pulled towards the matchbox where they should be aligned carefully. it is very important that the clicker is still operating fine (this should be tested from time to time during final assembly). now the film spools get fixed with duct tape to keep them in place mecahnical and - more important - to get the contact points of the film spools and the matchbox light tight. this should be done in several layers to make sure that no light can enter anywhere. if possible the duct tape should not be put directly on the matchbox, but rather only on the duct tape around its corners (the one with the felt inside) - this makes the disassembly easier and increases the chance to be able to reuse the camera after disassembly. one has to be very careful to never put any duct tape on the film anywhere, because this would make the film transport impossible.
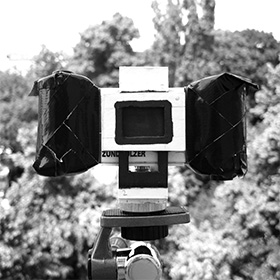
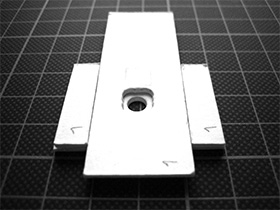
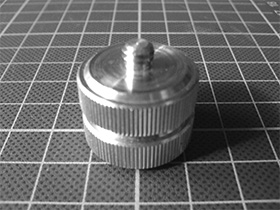
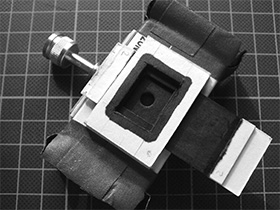
for mounting the camera on a tripod it is recommended to glue a tripod adapter (from 3/8" to 1/4") onto a piece of plastic of the size of the baes of the matchbox and then to glue that assembly to the base of the camera. glueing the tripod adapter directly to the matchbox will most probably break quickly (happened to me a few times before i started using the "larger plastic surface in the middle" version). the second picture shows the final camera (without film spools - for a picture with film spools have a look at the beginning of these instructions) with a shutter sized for the normal 35mm film format (36mm x 24mm).
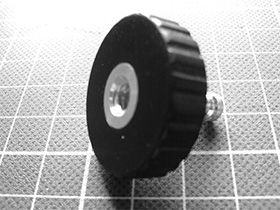
to avoid a possible clash of the shutter with the tripod, it is a good idea to extend the tripod mount by either using two other tripod adapters screwed into each other (3/8" to 1/4" adapter screwed into an 1/4" to 3/8" adapter) or using this kind of tripod screw shown in the other picture (the plastic part can be removed with some force of a tongs).
some final notes: recommeded filmtypes are modern films (i.e. with a high exposure lattitude) with low iso ratings. i usually use kodak "farbwelt" iso 100 film. with this kind of film and a pinhole of about 0.15mm i got good results with exposure times af about 20 seconds on a gray day. for other pinhole sizes etc. have a look at the pinhole calculator of mrpinhole. for longer exposure times reciprocity failure has to be kept in mind, i.e. the exposure time has to be increased more than just linear. the film transport works by rotating the film spool on top of the right side (seen from the back of the camera - to avoid confusion about the rotation direction it is a good idea to make a sign about it on top of the camera - it is against clock direction seen from above). it has to rotated until you hear 10 clicks (sometimes there is a louder and a more silent click per perforation hole - only the loud "real" ones are counted) for the normal 36mm x 24mm picture size.
when the film is finished (no more winding possible) one first has to remove the clicker by partially disassembling the camera at a completely dark place. then it can be rewound into the originally full film spool (still in complete darkness). afterwards the connection between the film spools can be cut - if this is done carefully, the empty film spool can be reused for the next film without problems.
one last note for the readers in non-metric countries: 1 inch is 25.4mm or 2.54 cm - plus some links which might be interesting to have a look at:
- www.flickr.com/groups/matchboxpinhole - matchbox pinhole at flickr
- meer-berlin.org - for updates of these instructions